Your First Triangle
Basic rendering with builtin shaders.
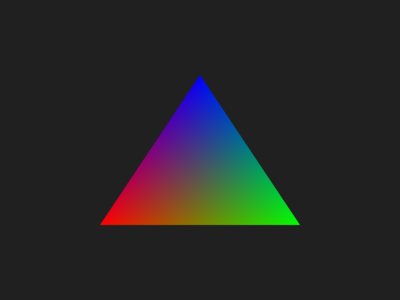
The Hello World of 3D graphics, rendering a single colored triangle using OpenGL.
Continuing from the Getting Started Guide, where we used basically just the Platform::
#include <Magnum/GL/Buffer.h>
#include <Magnum/GL/DefaultFramebuffer.h>
#include <Magnum/GL/Mesh.h>
#include <Magnum/Math/Color.h>
#include <Magnum/Platform/Sdl2Application.h>
#include <Magnum/Shaders/VertexColorGL.h>
The subclassed application looks very similar, only additionally containing the shader and a mesh instance. These are kept as class members as we'll reuse them every time the window gets redrawn. You can read about Magnum's platform abstractions in more detail in Platform support.
class TriangleExample: public Platform::Application {
    public:
        explicit TriangleExample(const Arguments& arguments);

    private:
        void drawEvent() override;

        GL::Mesh _mesh;
        Shaders::VertexColorGL2D _shader;
};
In the constructor we'll pass an optional Configuration parameter that allows us to set a window title and other window-related things; similarly there's also GLConfiguration for OpenGL-specific options such as multisampling.
TriangleExample::TriangleExample(const Arguments& arguments):
    Platform::Application{arguments, Configuration{}
        .setTitle("Magnum Triangle Example")}
{
Next we write out the mesh data, consisting of a position and color attribute, in a counterclockwise order. While it makes little difference at the scale we have here, a common practice is to interleave the attributes so each vertex is a single contiguous piece of memory. To save ourselves typing, we use hexadecimal color literals from the Math::
    using namespace Math::Literals;

    struct TriangleVertex {
        Vector2 position;
        Color3 color;
    };
    const TriangleVertex vertices[]{
        {{-0.5f, -0.5f}, 0xff0000_rgbf},    /* Left vertex, red color */
        {{ 0.5f, -0.5f}, 0x00ff00_rgbf},    /* Right vertex, green color */
        {{ 0.0f,  0.5f}, 0x0000ff_rgbf}     /* Top vertex, blue color */
    };
Onto configuring the GL::
The remaining arguments to the function are — zero offset from the beginning of the buffer, then first the position as the Shaders::
    _mesh.setCount(Containers::arraySize(vertices))
         .addVertexBuffer(GL::Buffer{vertices}, 0,
            Shaders::VertexColorGL2D::Position{},
            Shaders::VertexColorGL2D::Color3{});
}
The drawEvent() function now performs an actual rendering after clearing the default framebuffer, and then again swaps the buffers to make the rendering appear on the screen.
void TriangleExample::drawEvent() {
    GL::defaultFramebuffer.clear(GL::FramebufferClear::Color);

    _shader.draw(_mesh);

    swapBuffers();
}
Lastly, we need a main() function. It's supplied by the MAGNUM_
MAGNUM_APPLICATION_MAIN(TriangleExample)
That's all, now we can compile the whole example using CMake. Continuing from the Getting Started Guide, the only addition is finding & linking the Magnum::
find_package(Corrade REQUIRED Main)
find_package(Magnum REQUIRED GL Shaders Sdl2Application)

set_directory_properties(PROPERTIES CORRADE_USE_PEDANTIC_FLAGS ON)

add_executable(magnum-triangle WIN32 TriangleExample.cpp)
target_link_libraries(magnum-triangle PRIVATE
    Corrade::Main
    Magnum::Application
    Magnum::GL
    Magnum::Magnum
    Magnum::Shaders)
You can now try adding more triangles or changing the vertex data to see how the shader behaves. The full file content is linked below. Full source code is also available in the magnum-examples GitHub repository.
The ports branch contains additional patches for iOS, Android and Emscripten support that aren't present in master in order to keep the example code as simple as possible.